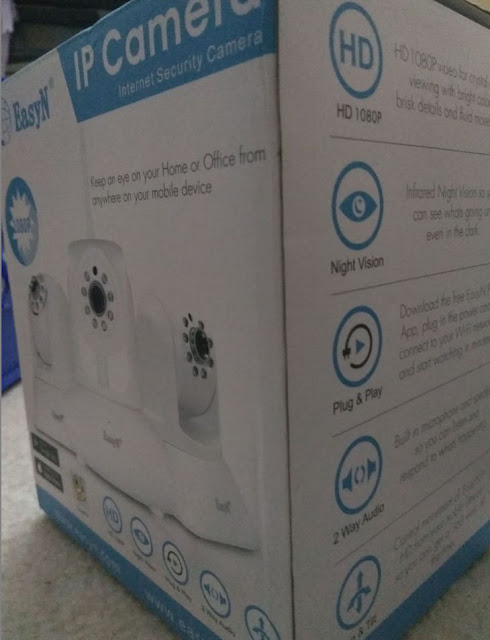
After storing my EasyN security ip web camera away for year, I find the need to setup it up again. It was purchased from China years ago, and like most products purchased from China, the documentation and support are poor. Nonetheless, it work well enough given the price. Here I want to document its setup and have it working with the app and working with the iSpy monitoring software that you can setup on your computer. I can also confirmed that as of April 23, 2020, the EasyN app is still being updated and works with the cam. iSpy (I use version 6.5.3.0) also works with the cam.
My model is the EasyN 10D.
Steps to setup the camera to work via Wifi
First. Reset the camera. There's a nub you poke on the camera to reset it to factory setting.
The camera has both LAN and Wifi abilities. I prefer the Wifi option just to have one less cable to worry about. To set up the Wifi, you will need to use an ethernet cable and connect it between the camera and your computer, to access the camera's device settings via a browser on your computer.
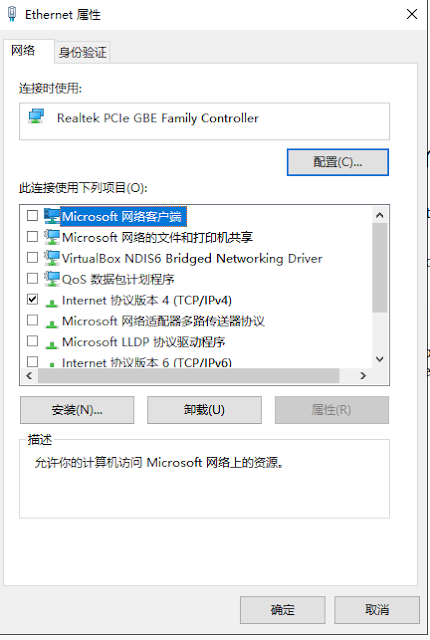
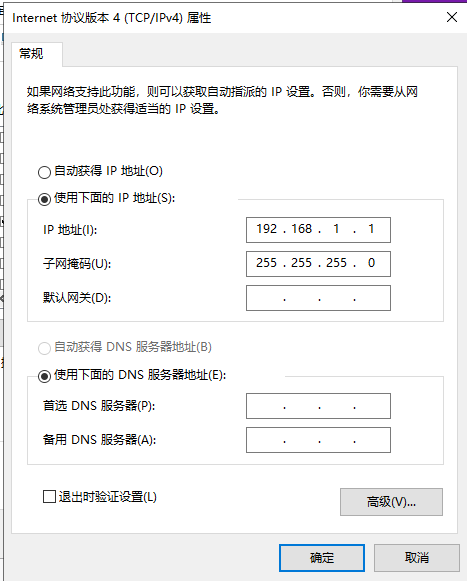
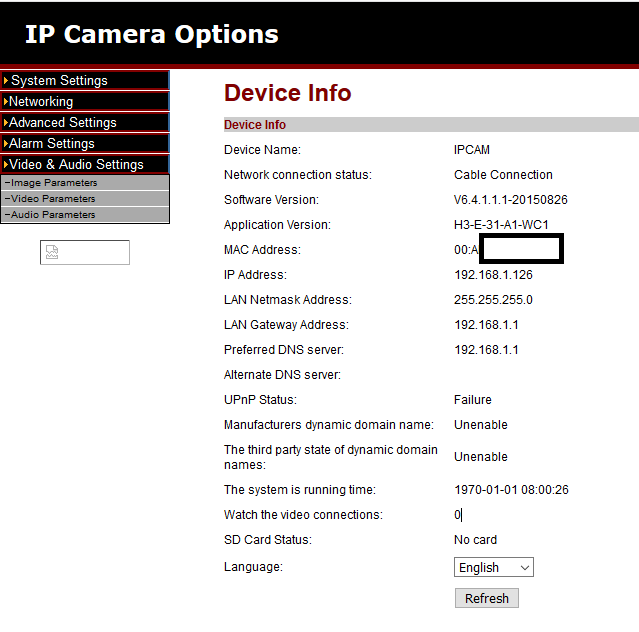
The default IP address of the model is 192.168.1.126. To access the camera settings, connect your ethernet cable between the camera and your computer. Given the default IP, you should set your computer's LAN to use 192.168.1.1 / 255.255.255.0. I don't believe the default gateway matters with two devices being directly connected, but set it to 192.168.1.1 can't hurt.
When I was setting this up, the first cable I used doesn't work. But retrying with another cable works. So keep that in mind. I think the problematic cable might just be a really old one that wasn't twisted, or maybe just broken.
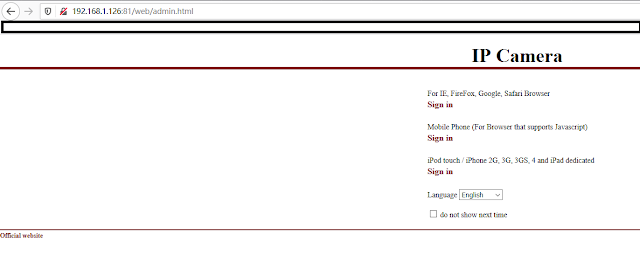
To access the camera's web settings interface to change settings, use a web browser and go to 192.168.1.126:81. By default, your login and password are "admin" and "admin".
In some situation, usually with Wifi networks, your admin might have a mac filter set for security reasons. After you have gain access to the camera's web settings interface, the LAN's mac address is listed in one of the menu screens but not the Wifi's mac address. The web settings interface just shows the mac address of the current network.
If your network has mac address filter set, you either have to disabled the filter temporary so you can get DHCP to connect and then check the mac address, or you need some other way to do this. The way I managed to get the Wifi's mac address is go through the Wifi setup for the camera, and at the every end, while I still have the ethernet cable connected and I'm still accessing the web settings interface via the LAN, I go back to the web setting interface menu that shows my mac address. At that point, it actually shows the Wifi's mac address instead.
Another thing to note is that the wireless settings only allows for DHCP, whereas the LAN settings seems to allow for both DHCP and static IP with DHCP being the default. In the words of the webcam firmware: "Automatically obtain IP" vs "Manually set the IP". This makes me suspect that if you use the LAN interface and plug the webcam into the router that has DHCP, you might actually get a different IP than 192.168.1.126 by default, and you will have to check your router's setting to figure out what IP is assigned to the webcam.
Steps to setup the camera to work with the EasyN App
The name of the app is EasyN. Once you have download the app, you can add a camera. For me, the app was able to find the camera on the network, and setup is very straight forward.
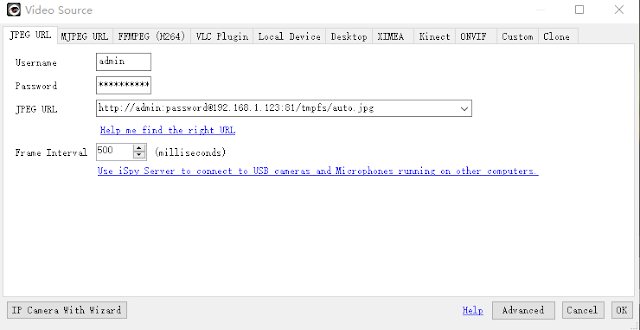
Steps to setup the camera to use with iSPY
Note that you can type the URL into your browser, and you will get a JPG of what the camera saw when you made the HTTP request.http://admin:password@192.168.1.123:81/tmpfs/auto.jpg
Final reminders after you have setup the camera
My camera is white and so heat from direct sun is less of an issue. That's not relevant if you are putting the camera somewhere shady, but buy a white security camera otherwise. For me, the camera gets sunlight from the morning to around 1:30pm, and the sunlight is not an issue.
You should write down on a piece of paper and tape it to the camera the two mac address of the camera, the default passwords, and the default IPs. That way, the next time you have to reset this, you don't have to google for all the information again. Or, at least bookmark this page.
In addition to the admin account, this camera also have two other accounts (user and guest). Make sure you change the password (and ideally the login name also) of these other accounts. There's probably not much you can do to prevent the government from spying on you, but you can certainty keep out the moms and pops hackers.

